AWS Elastic BeanStalk and RDS Quick Setup
Introduction:
Setup an AWS environment for testing and production environment can save a lot time compared with local environment setup. Also, a cloud environment helps developers cooperate more conveniently in web application development and deployment. This post shows how to setup Elastic BeanStalk and Rational Database system for serving a RESTful server.
Elastic BeanStalk
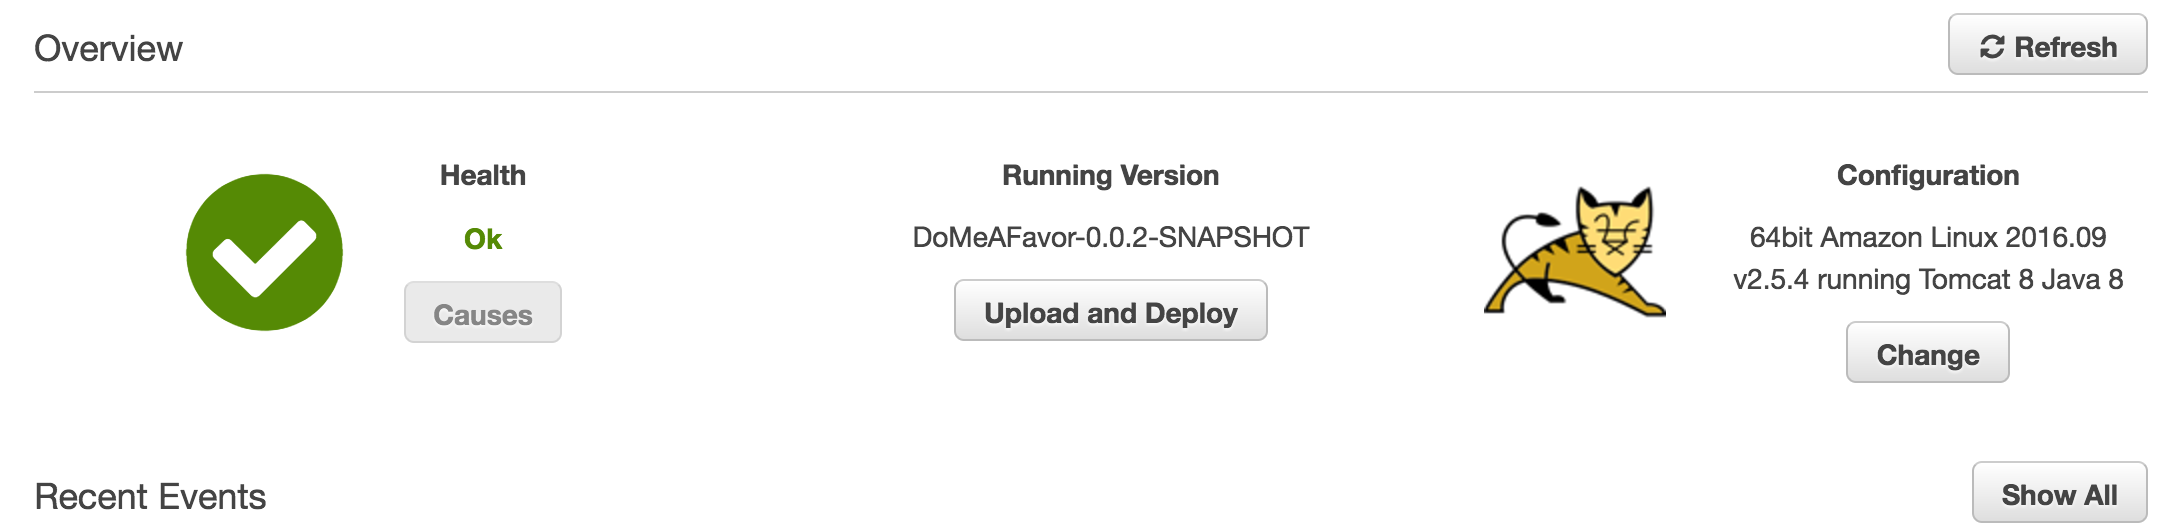
Elastic BeanStalk is an easy deployment service for web application. Just select which server you need (I used Tomcat), and upload the war file, then everything is done. You can visit and get the response through the url. Here I deployed my server code on the Elastic BeanStalk.
RDS
Since we have the server now, we need a database to connect with the server, cloud database is our first choice because each developers can corporate with each other conveniently. Here we choose RDS, Rational Database System. It can directly connect with the elastic beanstalk. Just take the following steps.
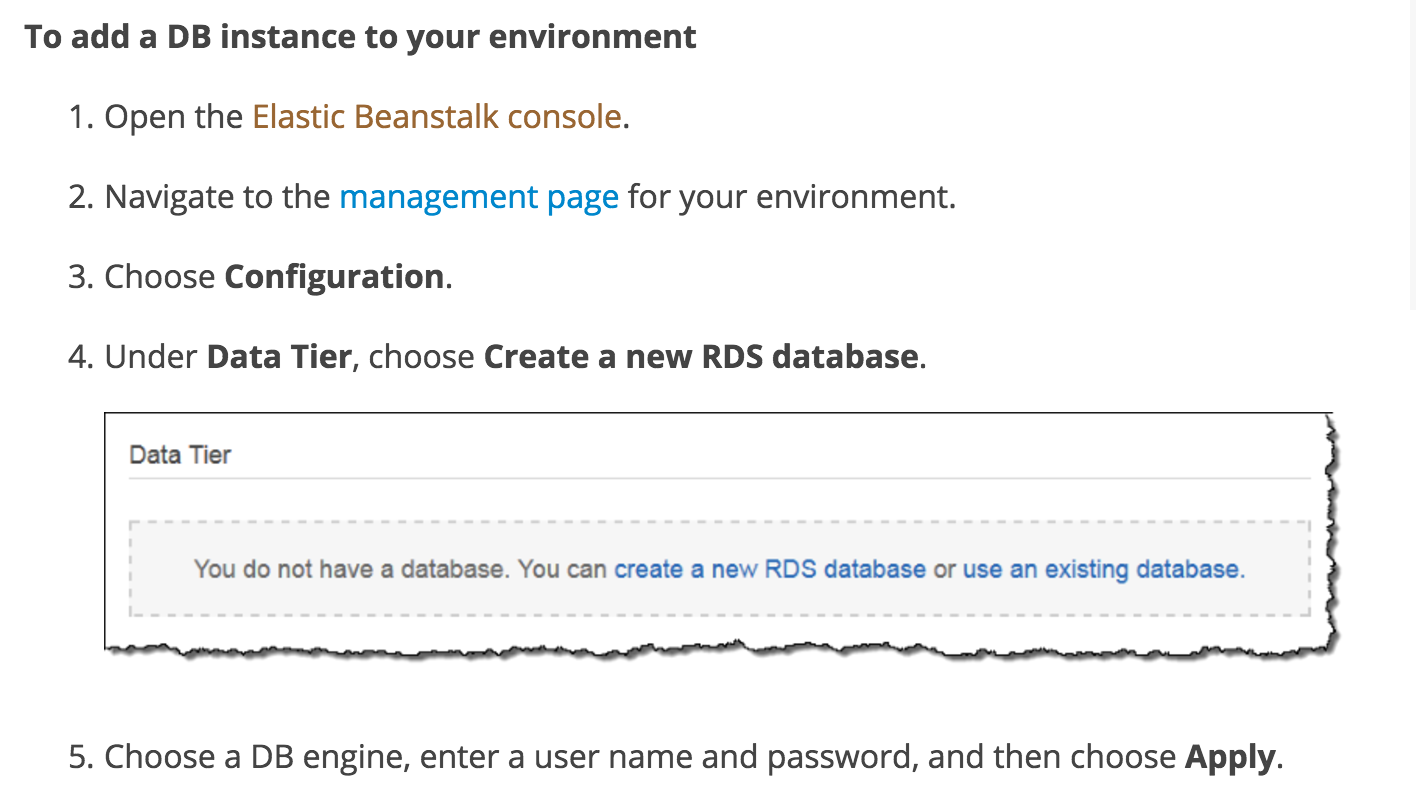
You can also refer the documentation for this configuration.
Now you can remote connect the mysql server
mysql -h [server_name // given in RDS] -u username -p password
Note username and password are defined when initialize the database
EC2
Maybe you will have the doubt. Why not use EC2 directly? In my understanding, EC2 is a complete virtual machine. Either Elastic BeanStalk or RDS are partial modules. To use EC2, you have to configure the entire environment (path, config files, etc).
Using Elastic BeanStalk and RDS is convenient, all the configurations are completed, we just need to upload our warfile/remote connect the database. We don’t need worry about the configuration, the system path, etc.
In conclusion, if you want to take control of everything or you need to build a complex server, use EC2 is the first choice. Otherwise, choose the seperate service and leave the annoyed environment setup to AWS!
Useful commands
Connect to EC2
ssh -i [key_location] ec2-user@[ec2_dns]
Remember to chmod of the key before connect.